


 450
450
INSTALLATION INSTRUCTIONS
Step 1
Clean all surfaces. Remove contaminants from the shaft, sleeve, washer, nut, and bearing.
Step 2
Consider if nut and washer need to be slid on before or after bearing. Consider direction of nut and washer if slid on first.
Step 3
Use a light oil to lubricate the outside of the bearing sleeve, including the threads.
Do not apply anti-seize lubricant to tapered surfaces.
Step 4
Slide the mounted bearing unit onto the shaft and sleeve. Tap the sleeve into the bearing and check the alignment of the mounting holes.
Step 5
Slip the washer over the threaded portion of the adapter sleeve. Align the washer key with the sleeve split.
Step 6
Lightly oil the chamfered side of the nut. Slide the nut over the sleeve (chamfered side first) and begin to thread the nut to the adapter sleeve. Do not tighten the nut.
Ensure that the face of the nut is lubricated where it will make contact with the washer. Failure to lubricate these surfaces can cause friction during tightening and shear the washer key.
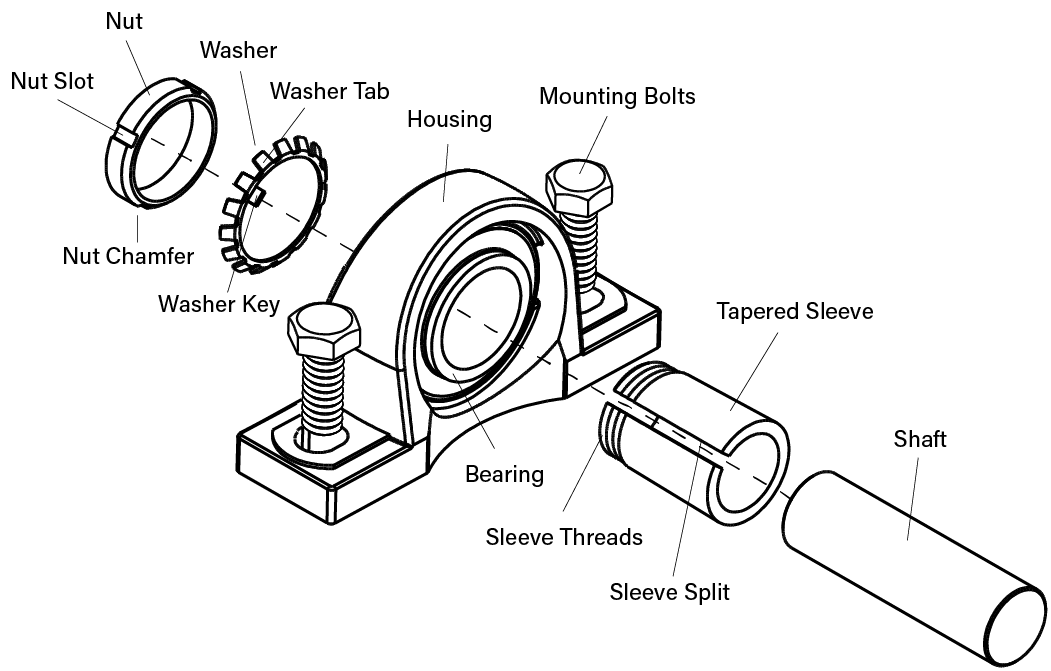
Step 7
Loosely mount the housing to the mounting surface. The bolts should only be tight enough to hold the housing down, but loose enough to allow some axial movement. Over-tightening will not allow the bearing to move when clamping the sleeve onto the shaft.
Step 8
While ensuring the shaft can not rotate, tighten the nut to the torque listed in Table 4.
Step 9
Lock the nut in place on the bearing by bending a washer tab down into one of the nut slots. If needed, slightly tighten the nut to align it with the tab.
Step 10
After ensuring that the bearing is not bound or axially pre-loaded, tighten the mounting bolts.
NOTE: If you are installing a second pillow block, repeat steps above.
| Bearing Number | Torque (ft-lb) |
|---|---|
| UK 205 | 22 |
| UK 206 | 29 |
| UK 207 | 43 |
| UK 208 | 58 |
| UK 209 | 58 |
| UK 210 | 73 |
| UK 211 | 102 |
| UK 212 | 145 |
| UK 213 | 159 |
| UK 215 | 183 |
| UK 216 | 232 |
| UK 217 | 297 |
| UK 218 | 354 |
| UK 305 | 29 |
| UK 306 | 43 |
| UK 307 | 58 |
| UK 308 | 79 |
| UK 309 | 108 |
| UK 310 | 145 |
| UK 311 | 181 |
| UK 312 | 224 |
| UK 313 | 260 |
| UK 315 | 369 |
| UK 316 | 434 |
| UK 317 | 513 |
| UK 318 | 593 |
| UK 319 | 694 |
| UK 320 | 853 |
| UK 322 | 1193 |
| UK 324 | 1439 |
| UK 326 | 1779 |
| UK 328 | 2119 |
Associated Part Numbers
UKP


